If you’ve ever been unfortunate enough to have your car roof cave in, you know how hard it can be to figure out what to do. You can take your car to an auto body shop for repairs, which can be expensive and time-consuming.
But what if there was a way to repair the damage yourself? With some knowledge and the right tools, fixing a caved-in car roof is possible without taking your car to a body shop.
This article will discuss the steps needed to fix a caved-in car roof. We’ll also provide tips on ensuring you do the best job possible and advise on what tools you need.
So if you’re ready, let’s get started!
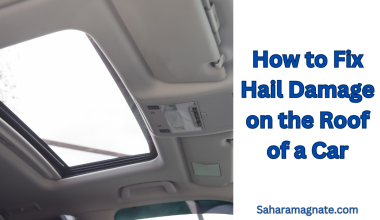
How to Fix a Caved-in Car Roof
Having a caved-in car roof isn’t an ideal situation, especially when a powerful force like hail causes it.
Before you get to the part where you can have your car repaired and looking good as new, you need to fix the immediate problem.
These steps can help ensure your car’s roof is safe and secure again!
Step 1: Diagnosing the Problem
The first step to fix a caved-in car roof is to determine the source of the problem. The most common causes of a caved-in roof are collisions, weather-related incidents, or structural collapses. Knowing the cause will help you determine the best way to fix it.
It is possible that the roof has caved in due to a collision or other external force, such as a fallen tree limb.
In this case, you will need to assess whether there is significant structural damage before deciding on a course of action.
If there is, you may need to have professional repair services come out and look at it.
On the other hand, if your roof caved in due to weather-related issues like snow or heavy rain, you can repair it yourself with some DIY techniques.
You can use body filler and fiberglass cloth to patch up any holes or cracks in the roof and seal them with epoxy resin for extra reinforcement.
Step 2: Gathering the Necessary Materials
Now that you know what you’re dealing with and have evaluated your car roof’s condition, it’s time to gather the materials necessary to repair the damage.
Most of what you need can be found at a local auto parts store or home improvement store.
You’ll need the following:
- 3 to 4 cans of spray foam insulation
- A sheet or two of aluminum foil
- A razor blade
- Epoxy resin or marine adhesive
- A surface hardener (optional)
- Sandpaper or primer (optional)
Read the instructions for the spray foam insulation cans before you buy them. Some brands require a certain number of layers, so getting the exact number of cans you need is vital.
Step 3: Removing Debris and Old Parts
Once you’ve got the top of your car prepped, it’s time to remove the debris and old parts. Of course, you want to ensure any debris, rust, and other broken pieces are completely removed before starting the repair process.
Removing these old parts is crucial as they could cause further damage.
Start with a Vacuum Cleaner
The vacuum cleaner is one of the best tools to remove debris, dirt, and other unwanted bits from your car’s roof. This will help you assess the damage and accurately assess what needs fixing.
Take off Any Trim Pieces
Once you’ve vacuumed, you can remove any trim pieces, like rubber seals from around windows or windshields, that might be in the way of the repair process.
Removing these trims is necessary to access all areas that need fixing.
Sand Away Rust and Grime
Using a mechanical sander or sandpaper, sand away any rust or grime on and around the roof.
Make sure to get into all crevices so that no rust or grime is left behind and causes nasty surprises later on!
Finish up using a wire brush for tough spots for a thorough clean-up job that will give you an up-close look at what areas need patching.
Step 4: Strengthening Support Structures
The next step to fix a caved-in car roof is strengthening the support structures. Depending on the type of damage, this could include reinforcing the roof with additional steel rods, brackets, or bars.
Ensuring these supporting structures are securely affixed and don’t move is crucial. A stable base will help maintain the integrity of your car’s roof as it’s fixed.
Make sure to:
- Measure the length and size of steel rods needed for installation
- Cut off any extra pieces with a metal saw
- Securely attach them to your car’s roof according to the directions
- Test to make sure they are firmly in place and safe for use
- Weld the reinforcements into place for added stability if necessary
Conclusion
Repairing a caved-in car roof with some DIY knowledge and the right tools is possible. It’s important to know what type of roof your car has and address any significant damages before attempting to fix it yourself.
You’ll need to purchase the right tools and materials to complete the repair and also want to ensure you’re adequately trained before beginning the project.
Fixing a caved-in car roof may seem intimidating, but anyone can do it with suitable materials and time.
So if you find yourself with a caved-in roof, don’t despair! With the right know-how and a little elbow grease, your car roof will look as good as new in no time.