Are you ready to take your car to the next level? A fixed-point roof rack installation is a great vehicle upgrade. It’s a handy tool that can carry all sorts of cargo and free up valuable space inside your car. But with so many options figuring out where to start can take time and effort.
Don’t worry! In this article, we’ll walk you through the steps on how to install a fixed-point roof rack on your own.
We’ll take you through the necessary tools and materials, offer some tips for a successful installation, and answer any questions that arise along the way.
So buckle up because we’re about to journey from jalopies to SUVs!
Preparing Your Vehicle for Fixed Point Roof Racks
Installing fixed-point roof racks in your vehicle can be a great way to expand your storage capacity while keeping everything secure. But before you get started, you’ll need to do some prep work.
First, ensure that the weight of the items you plan to carry is within the carrying limit of your vehicle model.
You don’t want anything too heavy as this could cause damage to the body or collapse the entire rack.
Next, check for any damage or rust on the roof where you plan to attach your rack. If you find any, it’s best to get it taken care of before making any modifications.
It’s recommended that you also wax and polish the attachment area before beginning the installation of your fixed-point roof racks. This will ensure a secure attachment and help protect against future rust and corrosion.
Finally, double-check all measurements and ensure everything is lined up properly before starting installation.
Once everything is in place, follow the manufacturer’s instructions for attaching the rack, and remember to test its stability before loading up your items!
Gathering the Necessary Tools and Materials
Installing fixed-point roof racks is a relatively straightforward process, but you’ll need to ensure you have the right tools and materials handy before you start.
To begin, make sure you have the following:
- A ladder
- A drill
- Roof rack mounting accessories (these typically come with your roof rack)
- Tape measure
- Pencil
- Socket wrench and sockets
- Screwdriver set
Once you’ve gathered these items, ensure they are all in good working order. You’ll want to ensure that your roof rack mounting accessories’ screws, bolts, and other components fit correctly before installing them.
Once everything is in order, you can start the installation process! Have all your tools accessible so you don’t have to stop once you start.
Make sure each step is completed correctly, and double-check your work as you go along.
How to Install Fixed Point Roof Racks
After assessing the vehicle and prepping all your equipment, it’s time for some actual work:
Identifying the Timing of Your Installation
Once you’ve chosen the type of fixed-point rack that’s right for your car, it’s time to think about the timing of your installation.
Knowing when to install a fixed-point roof rack is essential, as there are several steps involved in the installation, and some require a certain amount of time.
Step 1: Mark off mounting points
The first step in installing a fixed-point roof rack is to mark off the mounting points on your vehicle. This will help ensure that the mounting points are in the correct location, resulting in a secure and stable fitment.
You’ll need to decide on a position that allows at least 5 cm between each mount and any obstacles like antennas or solar panels. Once located and marked, you can begin the drilling process.
Step 2: Drilling into the body panels
Once you know where you want each mount to go, you can begin drilling into your car’s body panels.
Depending on how much extra space you’ve left between your mounts and other components, you may need longer screws than usual.
It’s also essential to make sure that every hole is drilled at precisely 90 degrees so everything is held securely once installed.
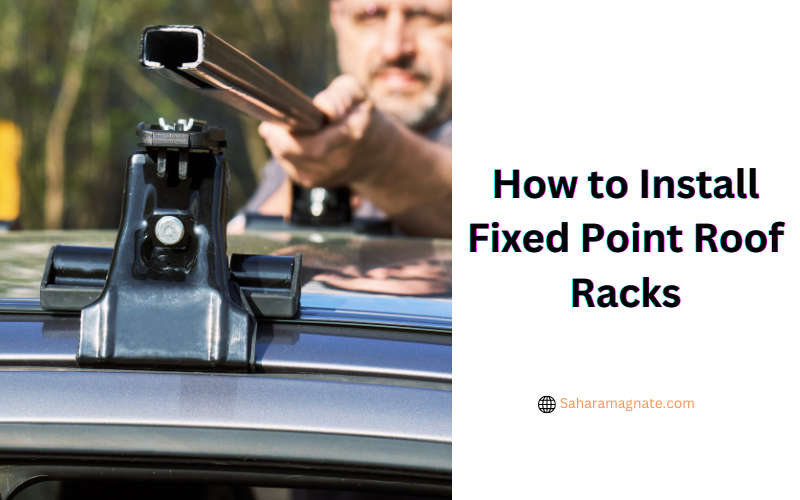
Step 3: Mounting the roof rack itself
Once all of your holes are drilled, it’s time to mount your roof racks themselves – this is a far easier task than marking off and drilling in each mount!
There should be instructions included with your roof rack kit that will tell you which screws should go into which holes.
Also, make sure that each screw fits snugly before tightening it all down – there should be no wiggle room here; whatever you do, don’t skip pre-drilling any holes for yourself!
Installing the Mounting Hardware and Crossbars
Now that you’ve double-checked for potential risks, it’s time to start the actual installation. Here’s what you need to do:
- Start by getting all the parts out of the box and double-check them against the instructions, as some parts may be marked differently than others.
- Install the mounting hardware onto your car’s roof according to your specific instructions. Most require drilling but drill through the predetermined holes before connecting everything.
- Once you have securely fastened all of the mounting hardware, install your crossbars onto the mounting hardware according to the instructions provided with your fixed point roof rack kit. Make sure they’re tightly secured—you don’t want weak spots!
- Finally, slide on any accessories that came with your kit, such as bike racks or ski holders and secure them with either an Allen wrench or screwdriver depending on what type of accessories were included in your kit.
And there you have it—you’re ready to hit the slopes or ride trails with complete peace of mind knowing that your fixed point roof rack is installed correctly and ready to go!
Securing the Rack to Your Vehicle and Testing It
The next step on how to install a fixed point roof rack is to secure the rack to your vehicle. This is done with the provided brackets designed to fit the existing mount points on your car’s frame.
Once you have placed the brackets securely and tightened all mounting hardware, it’s time to test out your new roof rack!
Test every part of the system before heading off on your adventure. Check that all mounting bolts are tight, and ensure no loose parts or wires could loosen up over time.
Put some weight on it—like a few groceries bags—to ensure it holds firmly in place. If everything feels good, you know you’re good to go!
Maintenance Tips for Fixed Point Roof Racks
Installing a fixed point roof rack is a great way to extend the storage capacity of your car, but it’s important to remember that regular maintenance is necessary to keep it running at its best.
Here’s what you need to know about maintaining your fixed point roof racks:
Cleaning
Cleaning your roof rack regularly will help prevent corrosion and maintain its strength. It’s best to start by removing dirt and debris from the rack, then use a sponge or cloth with warm water and mild soap to wipe down the rack.
Ensure you’re careful around the footpads, as they can be easily damaged if not handled properly.
Lubrication
To ensure that the racks move smoothly and freely, it’s essential to lubricate the rails with a lubricant specifically designed for roof racks. This will help prevent rust and corrosion buildup, which can cause significant damage over time.
Tightening Bolts
You should also periodically check for loose or missing bolts/nuts on your roof racks. If anything has become loose or missing, you should replace them immediately to keep your racks secure and safe.
Regular maintenance of your fixed-point roof rack will go a long way towards preserving its performance and longevity, so it pays off in the long run.
Ultimately, it’s important to remember that proper installation is just part of owning a fixed point roof rack—it needs regular care and attention if you want it to continue performing well over time.
Conclusion
Installing fixed-point roof racks may seem intimidating, but it can be easily and safely done with the right tools and knowledge.
Make sure to take your time with the process and that you have the appropriate tools for installation.
If you take the time to do your research and install your roof racks properly, you’ll have a secure, stable roof rack that can accommodate your outdoor gear and supplies.
So the next time you’re heading out on an adventure, ensure your roof rack is installed correctly and ready to help you reach your destination.